ESP32-C3 HA lux
A small lux sensor and on/off LED that behaves like something you bought: plug it in, scan the QR code on its screen, and it shows up in Home Assistant. Mode, schedule, and night thresholds are set from Home Assistant and kept on the device.
flowchart LR
  VEML7700 -->|I2C| ESP32[ESP32-C3]
  ESP32 -->|SPI| TFT[ST7789 screen]
  ESP32 -->|GPIO| LED[LED]
  ESP32 -->|Wi-Fi| HA[Home Assistant]
What you'll end up with
-
Live lux
Illuminance in Home Assistant and on the screen, updated every few seconds.
-
Binary LED
On or off only, with three on-device modes: Off, Schedule, and Night.
-
A live screen
240×240 colour display with Wi‑Fi status, lux, mode, and LED state. Turn it off from Home Assistant with Display.
-
Setup from your phone
Scan the code, pick your Wi‑Fi, done.
-
Settings that stick
Mode, schedule, and night thresholds survive reboots and keep working while disconnected.
-
Factory reset
Hold BOOT for 5 seconds to start setup again.
-
No Wi‑Fi password in the firmware
Not in the code and not in this repo.
What the screen shows
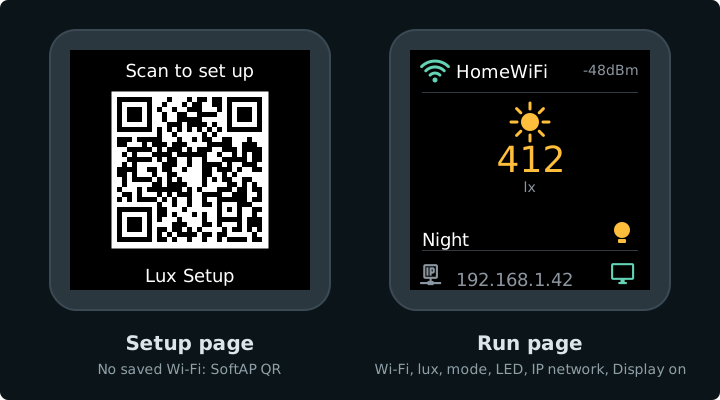
Mock-up from the firmware: SoftAP QR (no saved Wi‑Fi), then Wi‑Fi status, live lux, mode, LED state, IP, and Display-on cue. Run-page values are samples.
Parts
| Part | Notes | |
|---|---|---|
| ESP32-C3 DevKit | USB serial for flash and logs | |
| VEML7700 breakout | Ambient light over I2C at 0x10 |
|
| LED | GPIO-driven, on/off (GPIO6) | |
| ST7789 240×240 display | Square 8-pin SPI module | |
| Breadboard and jumper wires | Any solderless breadboard | |
| USB data cable | Charge-only cables won't work | |
| A computer running Ubuntu 24.04 | Builds and flashes the firmware |
Wiring is split into short steps under Wire and validate. The full pin map is on Validate.
Tutorial
-
What each block of the firmware does.
-
Install ESPHome and compile.
-
Breadboard, VEML7700, LED, display, then a check.
-
Upload over USB and watch it boot.
-
Join Wi‑Fi, add to Home Assistant, try the modes and reset.
The whole firmware is one file: firmware/lux.yaml.